Free Deliveries to all European Countries
Free Deliveries to all European Countries
5 years warranty
FSC®-certified
Assembly Guide
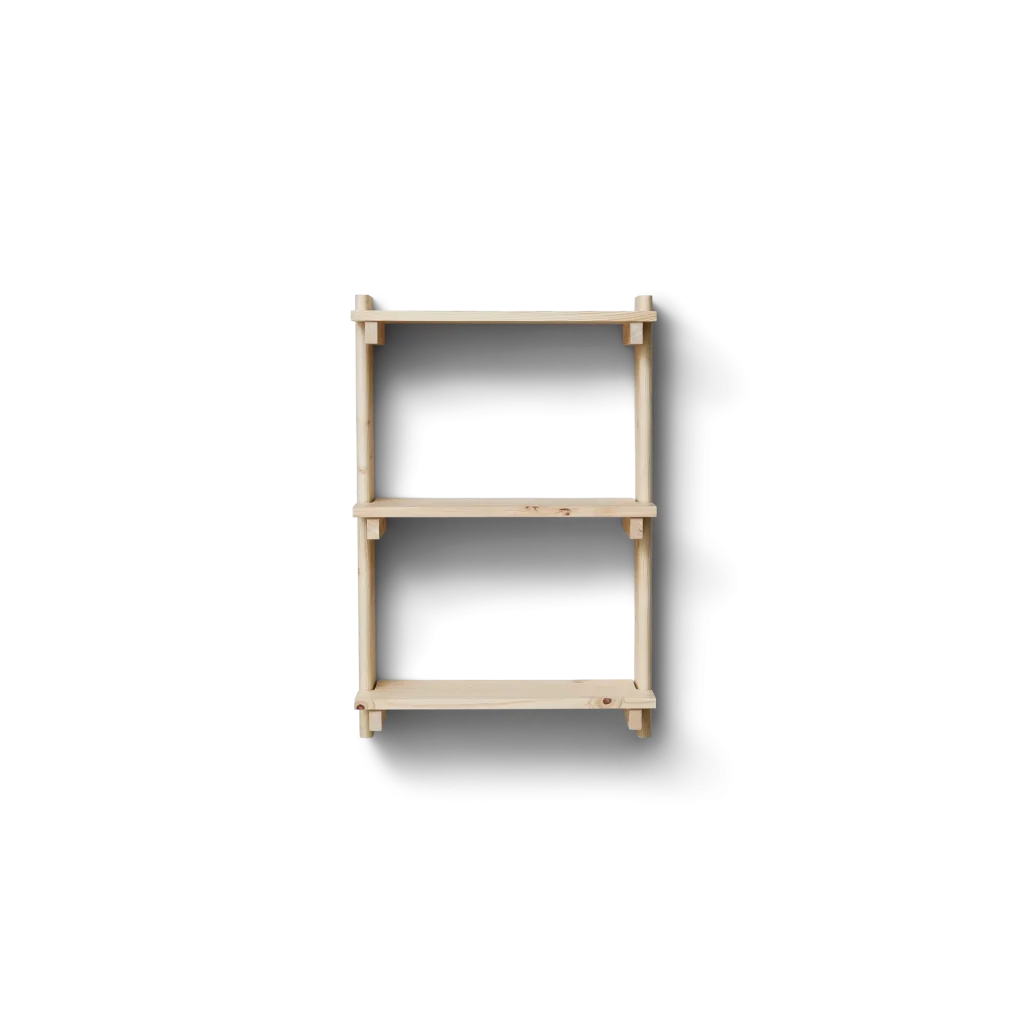
Place the components on a blanket to avoid scratches
on the floor and on the product.
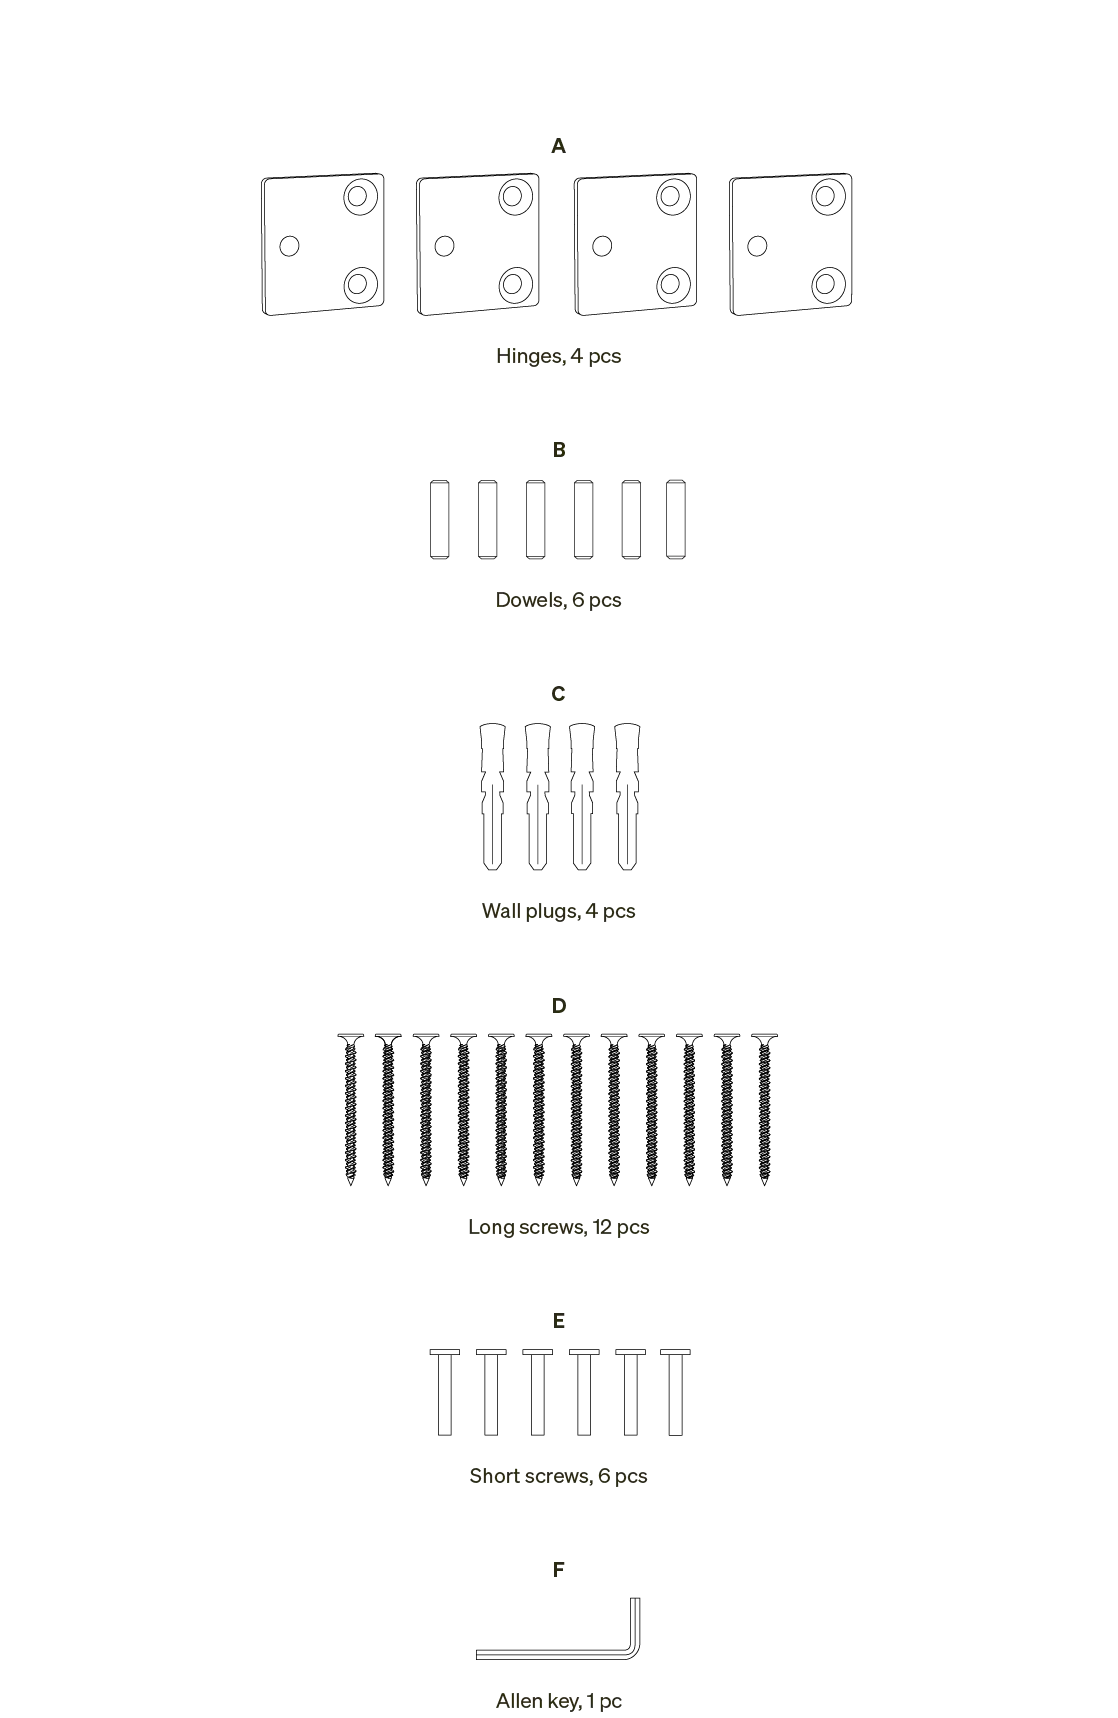
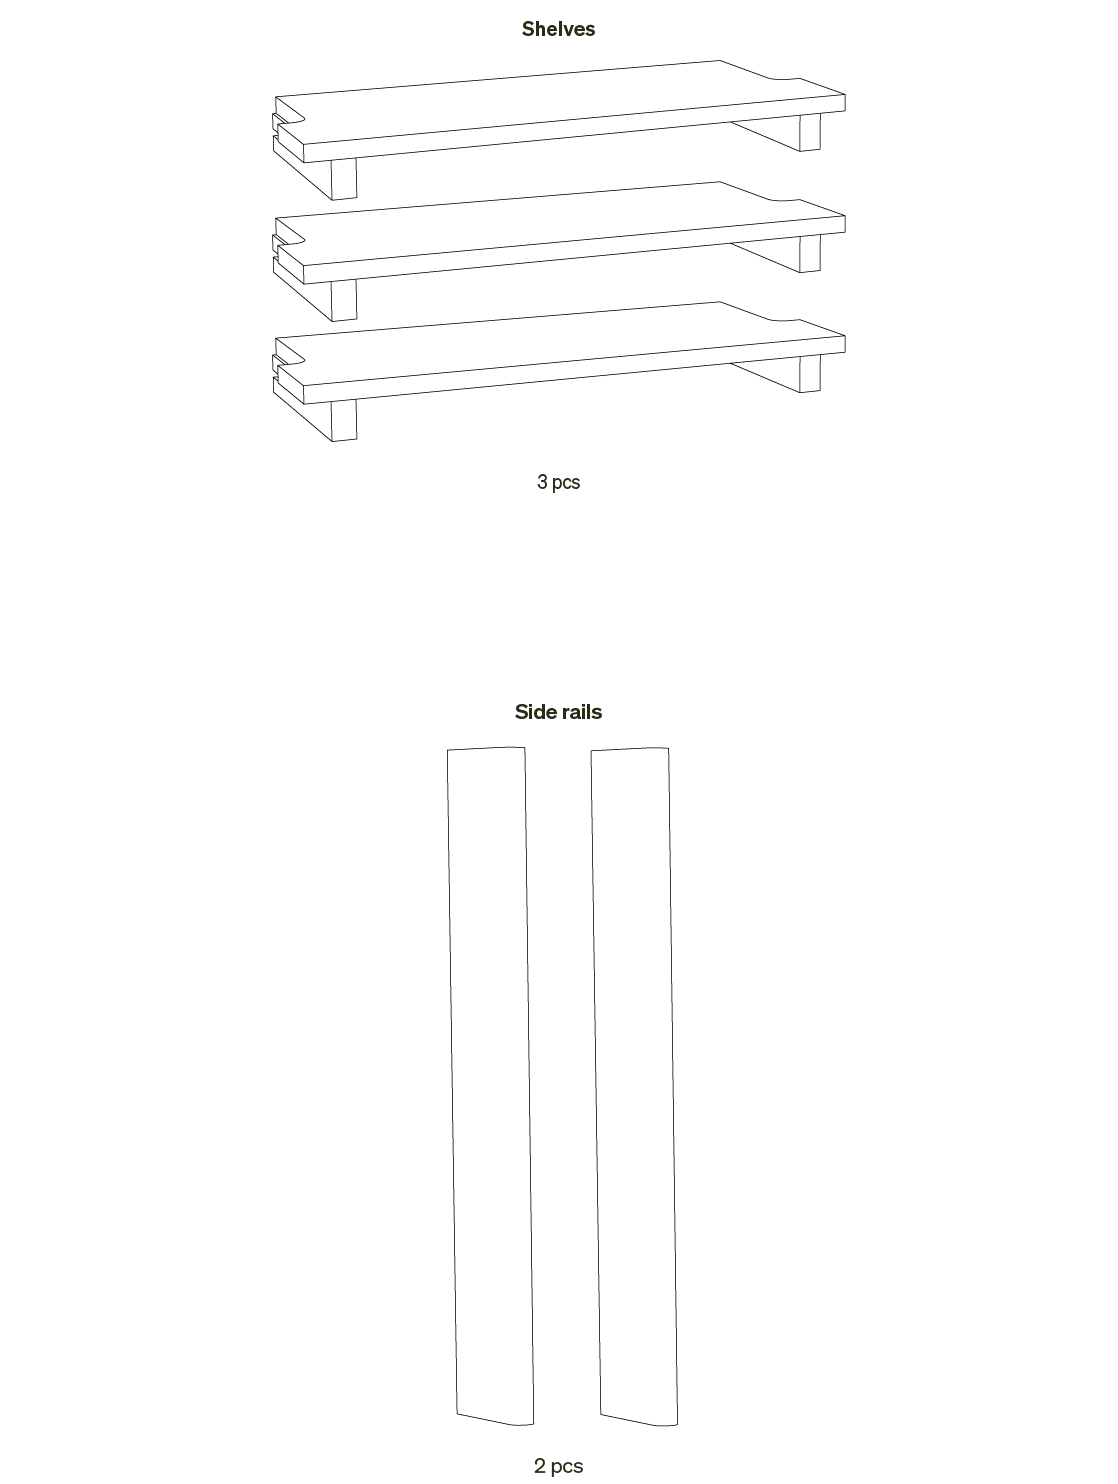
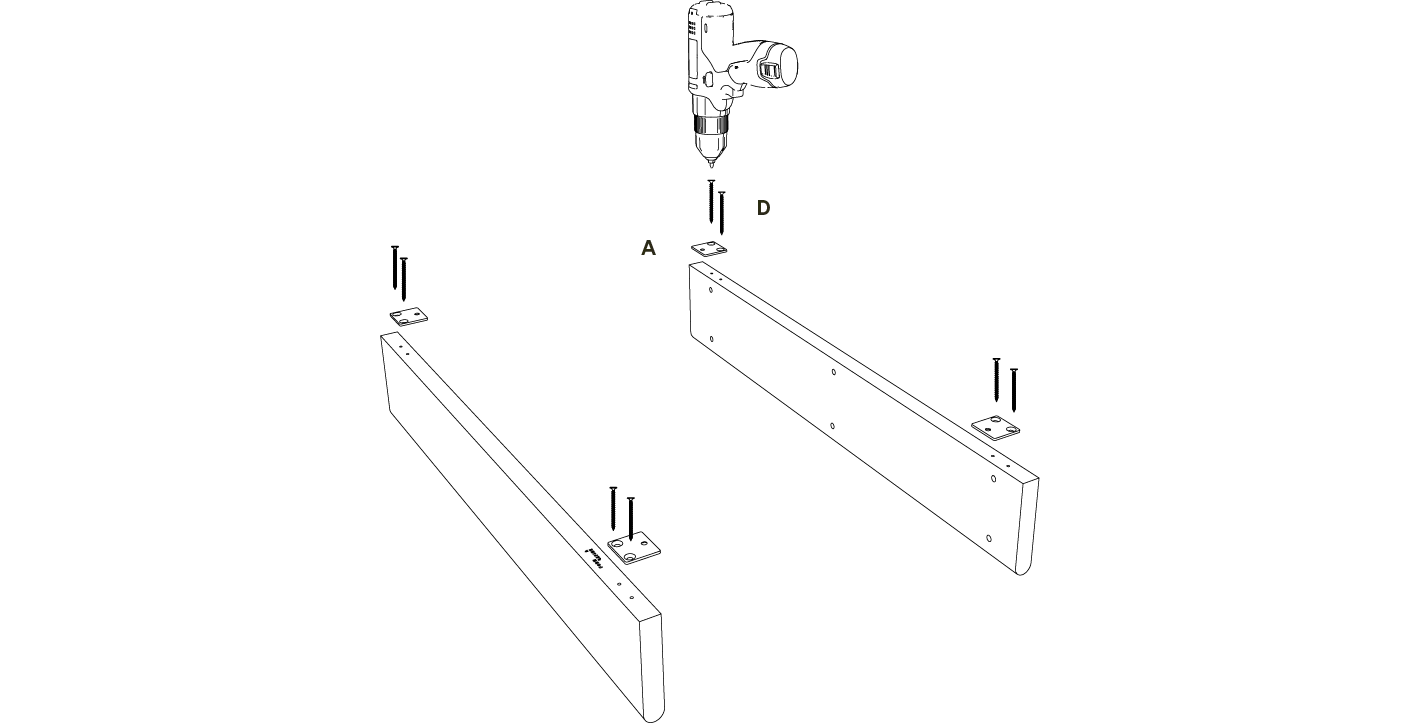
Place the side rails on the ground, ensuring they are oriented correctly.
Use a screwdriver or drill to attach the hinges (A) to the side rails with the long screws (D).
Insert the two middle dowels (B) into the holes closest
to the hinges on both side rails.
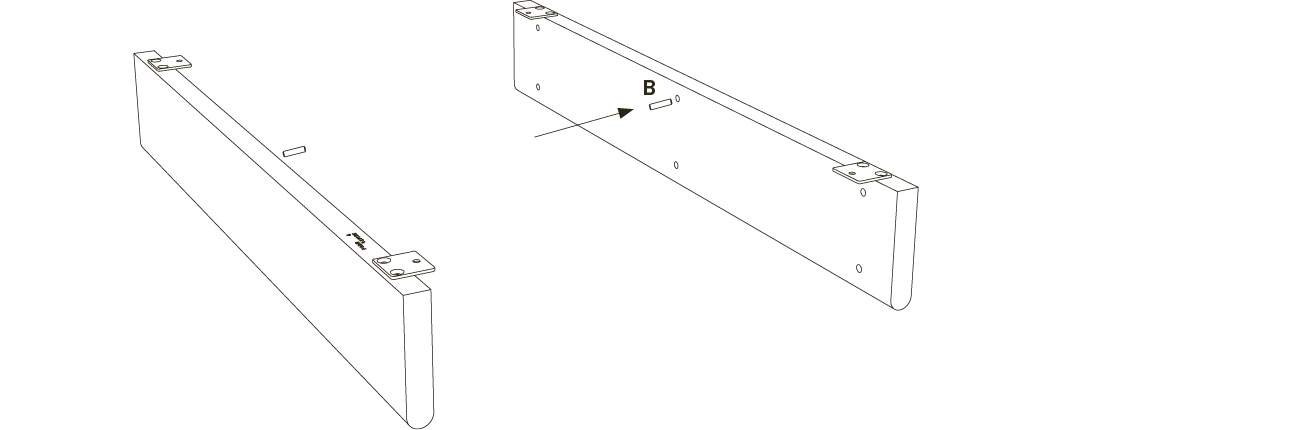
Turn the side rails so the hinges face down towards the ground.
Slide the middle shelf between the side rails, ensuring
the dowels fits into the slots on the shelf.
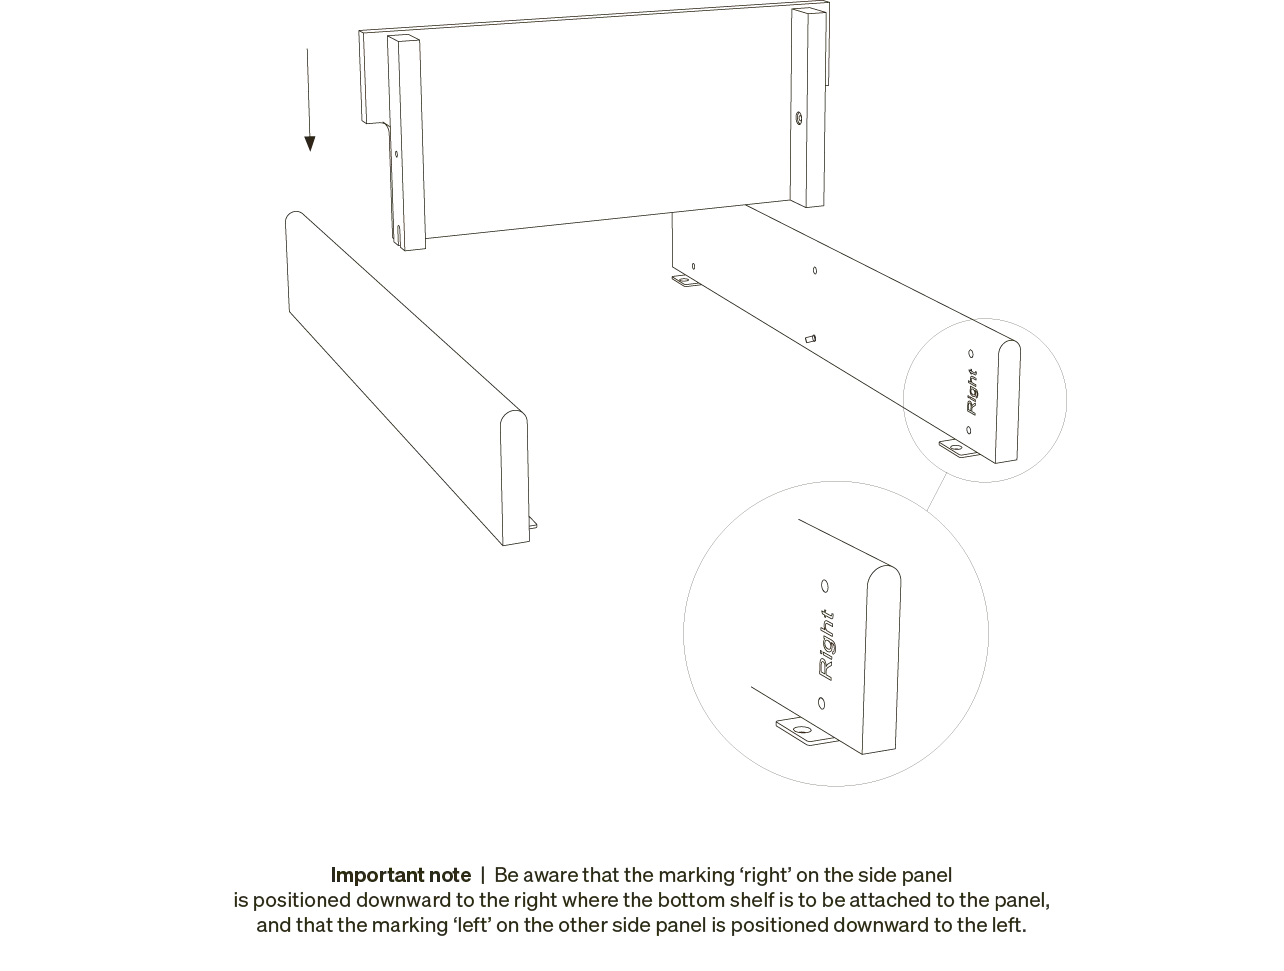
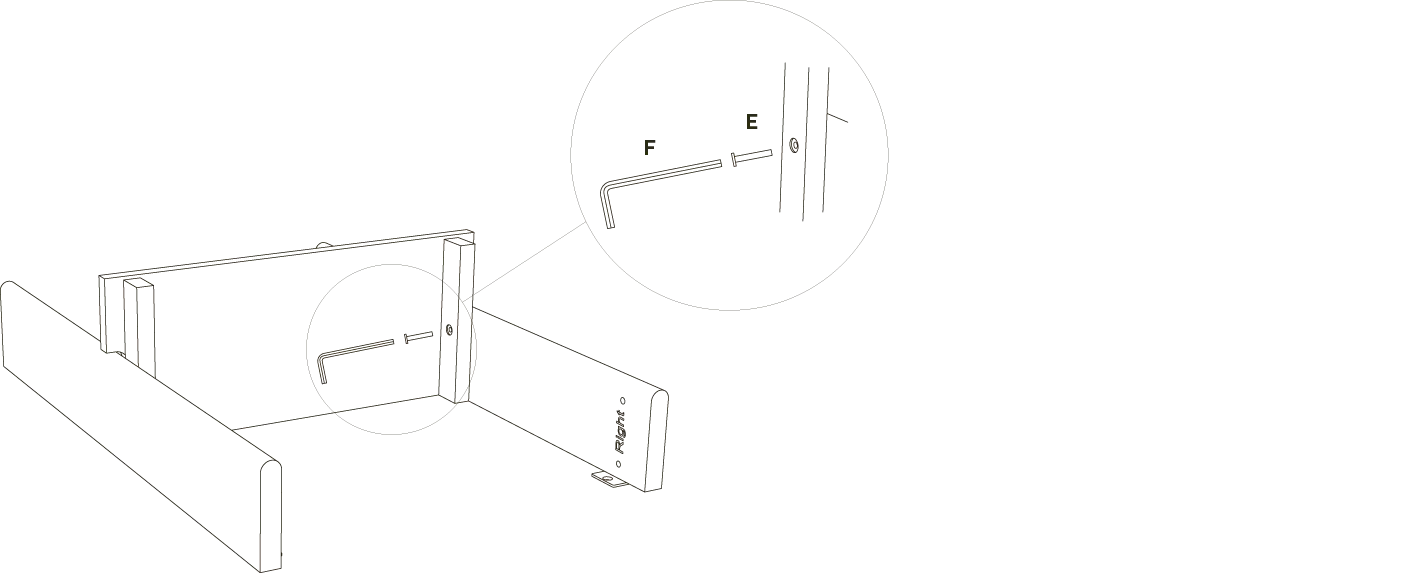
Secure the shelf to the side rails by screwing the short screws (E)
through the hole in the shelf and into the side rails using the allen key (F).
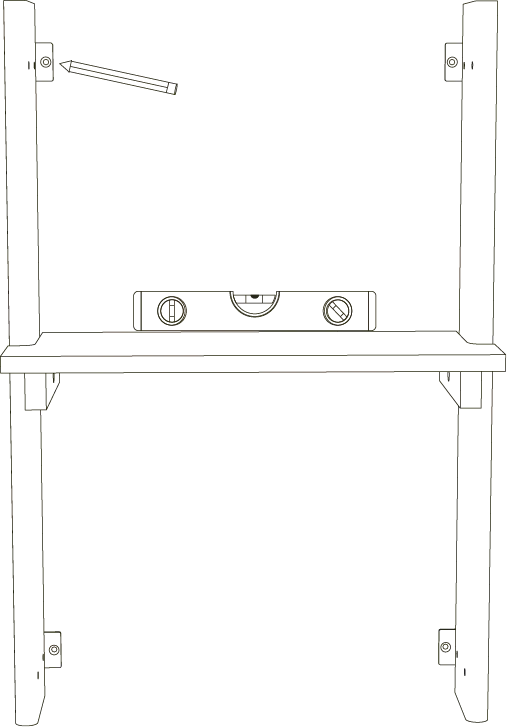
Hold the shelving unit in place where it is to be mounted.
Place a spirit level on the shelf to ensure it is straight. Use a pencil
to mark through the holes in the hinges where to drill on the wall.
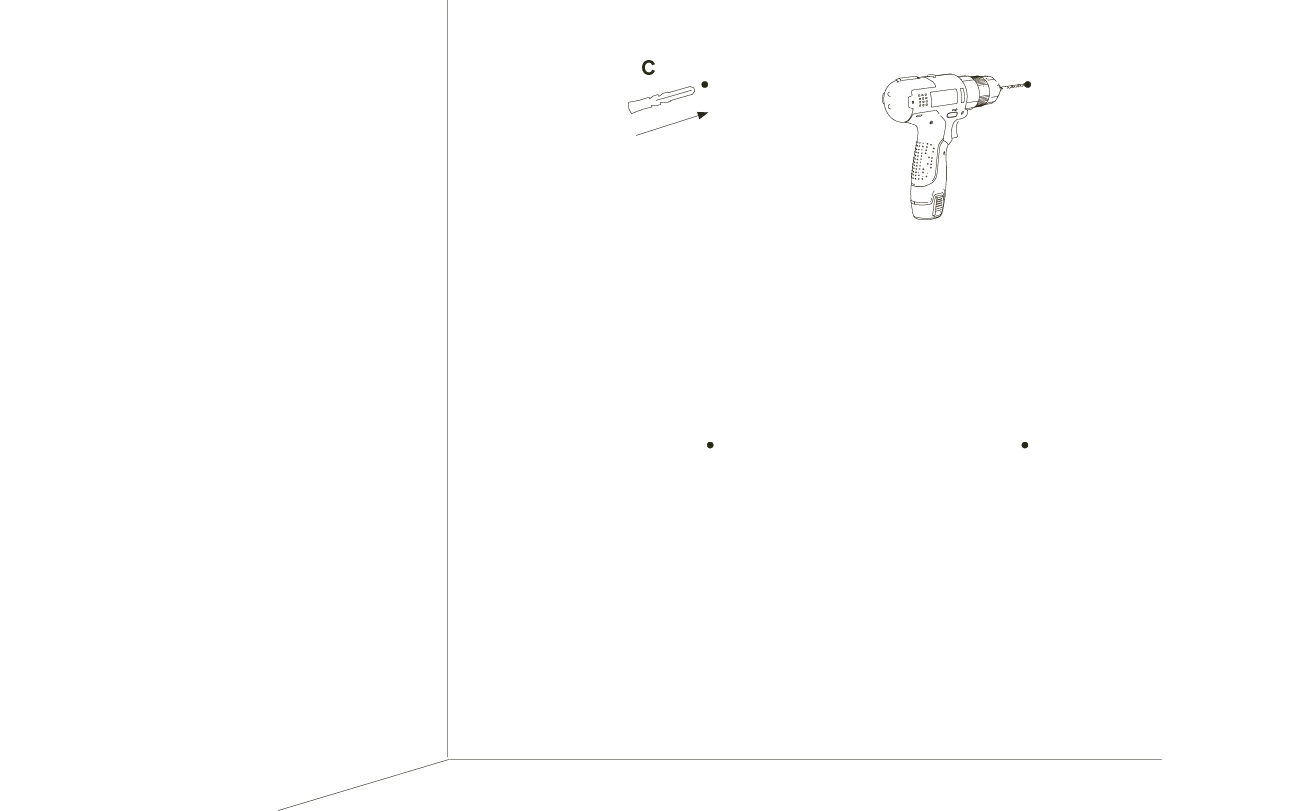
Remove the shelving unit. Use a drill to create holes at the marked
spots on the wall, then insert a wall plug (C) into each hole.
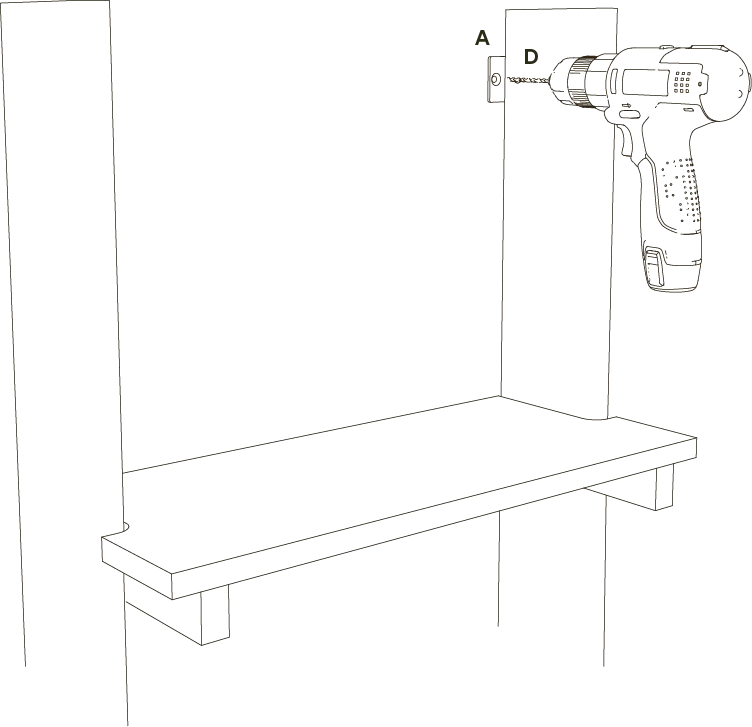
Place the shelving unit on the wall and secure it
using the four brackets (A) and the long screws (D).
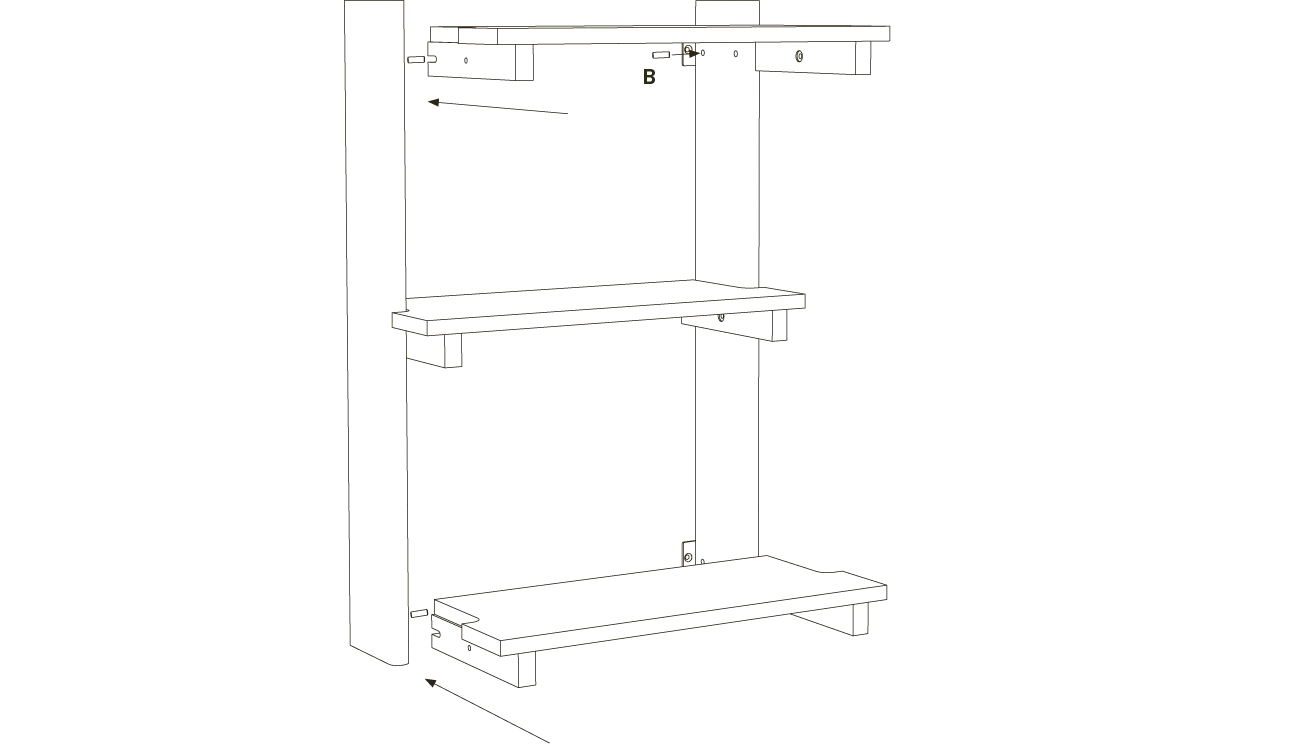
Then insert the four last dowels (B) into the holes on both side rails where the
top and bottom shelves are to be mounted. Then slide the two remaining shelves
between the side rails, ensuring the dowels fits into the slots on each shelf.
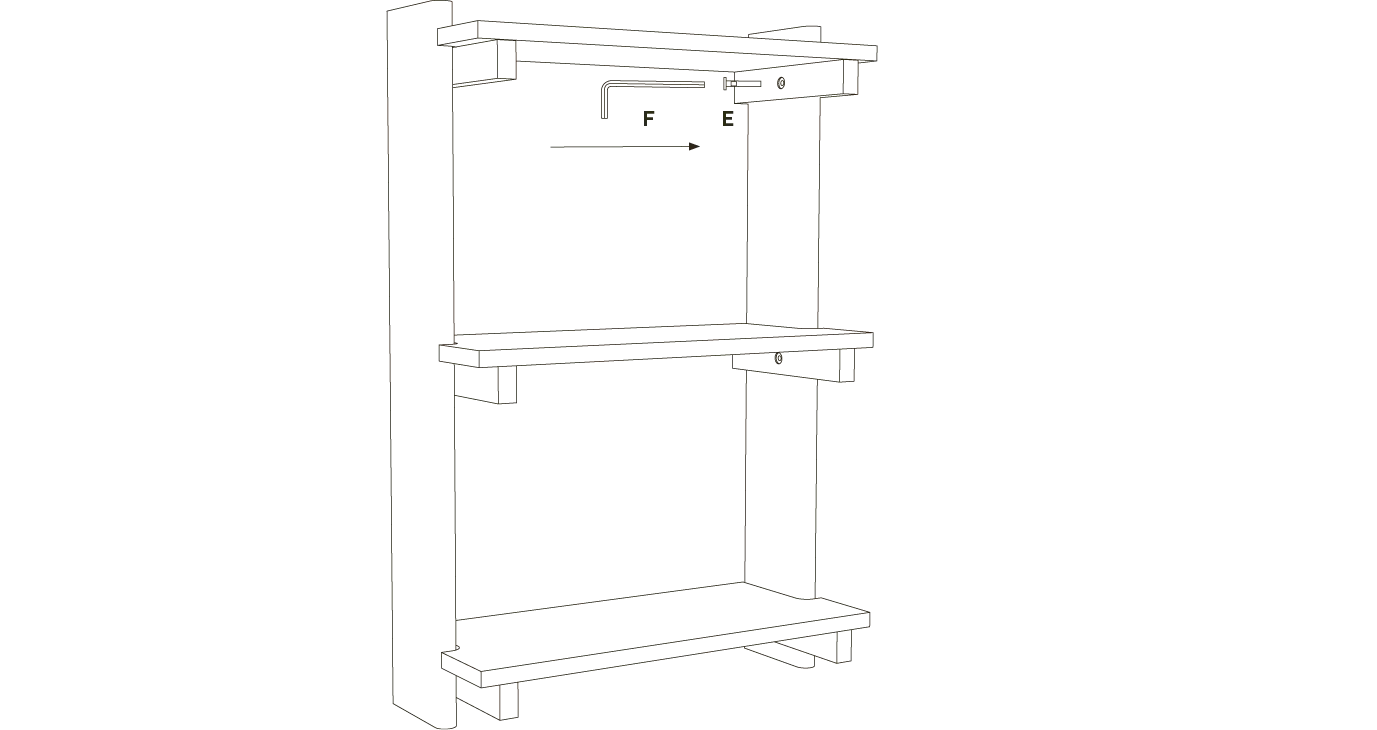
Secure the shelves to the side rails by screwing the short screws (E)
through the holes in the shelves and into the side rails using the allen key (F).

Introducing the 2026 Summer Collection, where light and material come together in quiet balance.

We have created a dedicated space for architects, press and retailers. Here, you can find high-resolution images, technical files, case references and selected furniture available in bespoke finishes and sizes.
Discover how skilled craftsmanship and respect for the material transform steel into timeless products designed to last.

This page outlines the four impact areas behind our responsibility approach, the certifications of our products, the principles guiding our design, and access to our ESG report.

A Line Storage Bench has turned into a collection of functional furniture. The collection is a mix of rediscovered classics and new reinterpretations of storage essentials.